2022-12-12
Before mounting, check the appearance of the strain gauge and measure the resistance value. Appearance inspection can be carried out with the naked eye or with the aid of a magnifying glass. The purpose is to observe whether the sensitive grid has rust spots, defects, alignment, damage to the base and covering layer, and whether the lead is intact. The purpose is to check whether there is a circuit break or short circuit in the sensitive grid, and to carry out resistance classification. For a group of strain gauges with common temperature compensation, the difference of resistance values should not exceed ±0.5. The strain gauge of the same measurement must have the same sensitivity.
For steel and other metal components, the surface paint, oxide layer and dirt are first removed, then ground or filed down, and polished with a fine emery cloth, usually called the process “grinding”. For very smooth components, it is necessary to cross grind some lines with fine emery cloth along the 45° direction to enhance adhesion. The grinding area is about 5 times the area of strain gauge. After polishing, use laser line to mark the exact position of the patch. The final process of surface treatment is cleaning, that is, using clean cotton yarn or cotton ball dipped in acetone or other volatile solvent to scrub the patch site repeatedly until no dirt can be seen on the cotton ball.
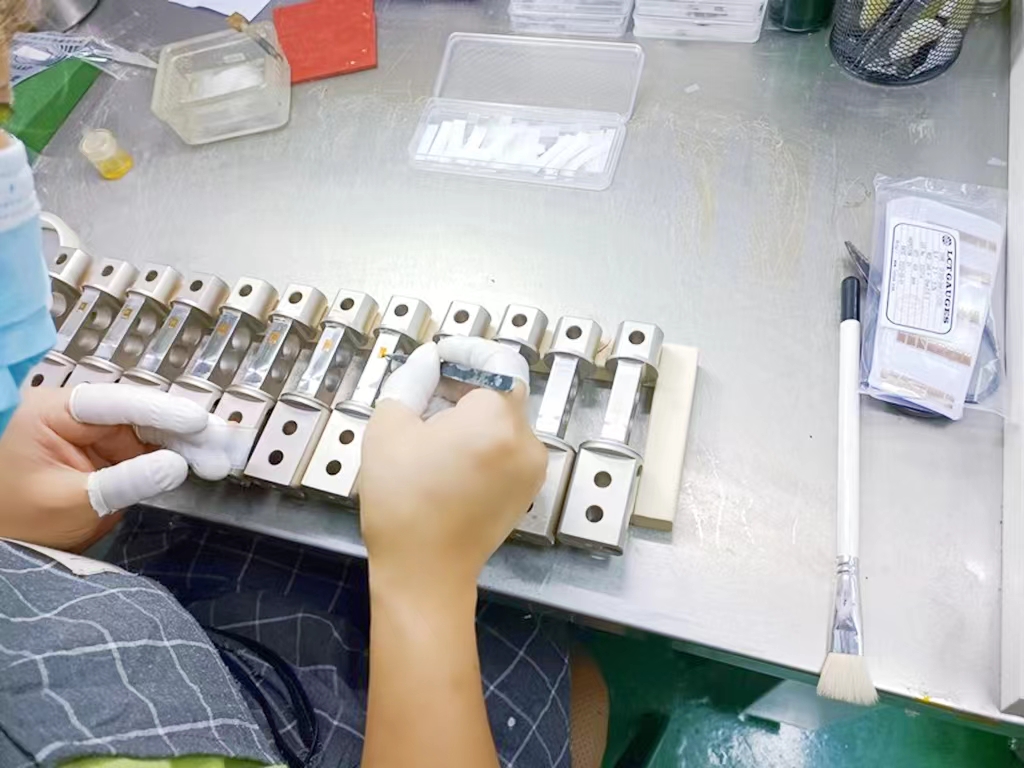
Patch technology varies with the adhesive used. The process of patch bonding is to drop a bit of patch glue on the patch position after the cleaning agent is volatilized, apply the glue evenly with the back of the strain gauge, and then use tweezers to move the strain gauge and adjust the position and Angle. After positioning, put a layer of polyethylene or tetrafluoroethylene film on the strain gauge, gently squeeze out the excess glue and bubbles with your fingers, and release the glue after the initial curing. The pasted strain gauge should ensure accurate position, firm bonding, uniform adhesive layer, no bubbles and clean.
After the initial curing of the binder, the wire can be welded. At normal temperature, the static measurement can use double-core multi-strand copper plastic wire as the lead, and the dynamic measurement can use three-core or four-core shielded cable as the lead. It is better to connect the strain gauge to the wire through the wiring terminal and ensure that there is no virtual welding. The wire should be bound and fixed with the specimen, and both ends of the wire should be marked according to the number of the measuring point.
Patch quality check includes appearance check, resistance and insulation resistance measurement. The appearance inspection mainly observes whether the position of the patch is correct, whether the transformer is damaged, whether the paste is firm and whether there are bubbles. Measuring the resistance value can check whether there is a break, loop. Insulation resistance is the most important test index. Insulation depends on the base of the strain gauge. Poorly pasted or insufficiently cured strain gauges tend to have low insulation resistance.
When the strain gauge is affected by moisture, the insulation resistance and bonding strength will be reduced, and the sensitive grid will rust seriously. Acid, base and oil immersion can even change the physical properties of the substrate and binder. In order to prevent the immersion of free moisture, rain and dew in the atmosphere and the intrusion of impurities such as acid, alkali and oil under special circumstances, the strain gauge that has been fully dried, solidified and welded with wire should be immediately coated with a protective layer.
